
How to Inspect and Maintain Commercial Truck Brakes
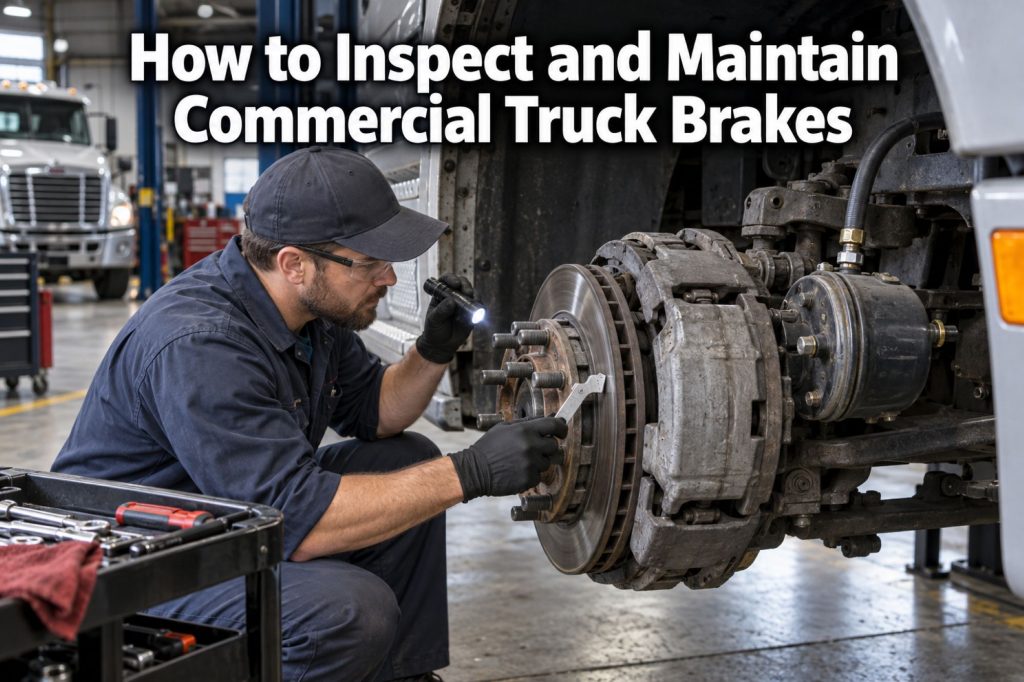
Commercial truck and trailer brakes must control thousands of pounds of vehicle weight under highway, urban, vocational, mountainous, and severe-duty operating conditions. Their condition directly affects stopping performance, vehicle stability, roadside-inspection results, and the safety of the driver and surrounding motorists.
A complete brake inspection involves more than checking whether the vehicle stops. Drivers and qualified brake inspectors must examine the air supply system, foundation brakes, chambers, hoses, friction materials, drums or rotors, ABS components, parking brakes, and the balance between the truck and trailer.
This guide explains how commercial truck brakes are inspected and maintained, what warning signs to watch for, and how inspection requirements differ between air disc brakes and S-cam drum brakes.
Understanding the Commercial Truck Brake System
Most heavy commercial trucks use compressed air to operate their service, parking, and emergency brakes.
A typical braking sequence can be simplified as:
Air Compressor → Air Dryer → Reservoirs → Brake Valve → Air Lines and Valves → Brake Chambers → Foundation Brakes
Each part of the system must operate correctly.
The Air Brake System produces, stores, controls, and distributes compressed air. The Brake Chambers and Actuators convert air pressure into mechanical force.
That force applies either:
- Air Disc Brakes, which clamp pads against a rotor
- Drum Brakes, which push brake shoes against the inside of a drum
Commercial combinations also include a separate Trailer Brake System connected to the tractor through the service and emergency air lines.
Driver Inspections vs Maintenance Inspections
Brake inspections occur at several different levels.
Driver Inspection
The driver checks the vehicle before operation and watches for defects throughout the trip.
A driver inspection can identify visible damage, air leaks, warning lights, low-pressure conditions, abnormal brake response, and other signs that the vehicle may not be safe to operate.
Preventive-Maintenance Inspection
A fleet technician or qualified brake inspector performs a more detailed examination according to the fleet’s maintenance schedule.
This inspection may include measurements, component testing, wheel removal, diagnostic equipment, and inspection of areas that cannot be fully evaluated during a walk-around.
Periodic Inspection
Commercial vehicles operating under applicable federal regulations must receive a periodic inspection at least once during the preceding 12 months. Each vehicle in a combination—including the tractor, semitrailer, full trailer, and converter dolly when equipped—is treated separately for periodic-inspection purposes. 49 CFR §396.17
Roadside Inspection
Enforcement personnel may inspect the brake system during a roadside commercial-vehicle inspection.
The inspection may include:
- Air-system condition
- Audible air leaks
- Brake-chamber condition
- Pushrod stroke
- Brake adjustment
- Friction-material condition
- Brake drums or rotors
- Air hoses and tubing
- ABS warning lamps
- Tractor and trailer brake connections
- Missing, loose, damaged, or inoperative components
Roadside inspections do not replace a fleet’s regular preventive-maintenance program.
Before Beginning a Brake Inspection
Brake inspections must be performed safely.
Before inspecting underneath or around a commercial vehicle:
- Park on a firm, level surface
- Follow the fleet’s lockout and safety procedures
- Chock the wheels when required
- Confirm whether the parking brakes must be applied or released for each test
- Keep unauthorized people away from the vehicle
- Use properly rated lifting and support equipment
- Never rely solely on an air suspension or hydraulic jack
- Allow overheated brake components to cool
- Wear appropriate eye and hand protection
- Follow the vehicle and brake manufacturers’ procedures
Spring-brake chambers contain powerful internal springs. They must not be disassembled unless the chamber is designed for service and the work is performed using the manufacturer’s approved procedure.
Daily Driver Brake Inspection
A driver’s inspection should begin before the vehicle enters service.
Federal rules require a driver to be satisfied that the commercial motor vehicle is in safe operating condition before driving. When applicable, the driver must also review the previous driver vehicle inspection report and verify that required repairs were certified. 49 CFR §396.13
Check Under the Vehicle
Before starting the truck, look beneath the tractor and trailer for:
- Loose or hanging air lines
- Damaged hoses
- Fluid contamination near the wheel ends
- Broken brake components
- Debris wrapped around an axle
- Components contacting tires or wheels
- Evidence of wheel-seal leakage
- Parts lying beneath the vehicle
Oil or grease near a brake assembly can indicate a wheel-end leak that may contaminate the friction material.
Check the Air Compressor and Pressure Build-Up
After starting the engine, monitor the air-pressure gauges.
Confirm that:
- System pressure builds normally
- Both primary and secondary systems respond
- The compressor does not require excessive time to build pressure
- The governor cuts in and out as expected
- Warning devices operate at the correct pressure
- The system does not lose air excessively
Exact pressure ranges and test procedures depend on the vehicle, system configuration, applicable regulations, and manufacturer specifications.
Slow pressure build-up may indicate:
- Air leaks
- Compressor wear
- Restricted air intake
- Air-dryer problems
- Governor problems
- Damaged air lines
- Reservoir or valve defects
Check Low-Air Warning Devices
Commercial air-braked vehicles use audible and visual warnings to alert the driver when system pressure becomes unsafe.
The warning system should activate during the approved low-pressure test procedure.
Do not operate a vehicle if the warning system fails or activates unexpectedly during normal driving.
Check Spring-Brake Operation
Spring brakes provide parking and emergency braking.
During an approved test, confirm that the parking-brake controls and spring brakes operate correctly. The vehicle should remain securely held when the parking brakes are applied.
Potential problems include:
- Weak or damaged spring-brake chambers
- Air leaks
- Improper adjustment
- Contaminated friction material
- Incorrect chamber installation
- Damaged control valves
- Broken or disconnected components
Never place yourself in the vehicle’s path while testing whether the parking brakes will hold.
Check for Air Leaks
Listen for escaping air around:
- Brake chambers
- Air hoses
- Gladhand connections
- Relay valves
- Foot-valve areas
- Reservoirs
- Air dryer
- Tractor-protection components
- Trailer control valves
- Fittings and connectors
Small leaks can worsen and reduce the system’s ability to maintain operating pressure.
The full air-loss test must follow the correct procedure for the vehicle configuration and applicable standards.
Perform a Low-Speed Brake Test
When the area is clear and safe, move the vehicle slowly and apply the service brakes.
Watch for:
- Delayed application
- Pulling to one side
- Weak braking
- Grabbing
- Vibration
- Unusual noise
- Excessive pedal travel
- Tractor or trailer brake imbalance
- ABS warning lamps
- Parking brakes that do not release completely
A low-speed test helps verify basic operation, but it does not prove that every wheel-end brake is functioning correctly.
Inspecting Air Lines and Hoses
Air lines carry control signals and operating pressure throughout the brake system.
Inspect hoses and tubing for:
- Cuts
- Cracks
- Abrasion
- Bulges
- Kinks
- Flattened sections
- Heat damage
- Improper repairs
- Loose fittings
- Contact with moving parts
- Contact with exhaust components
- Excessive stretching
- Missing support clips
- Audible leakage
A hose may appear intact while leaking at a fitting or beneath a protective covering.
Air lines should be properly routed and secured so suspension, steering, and axle movement do not pull, pinch, or rub them.
Inspecting Tractor-Trailer Air Connections
The tractor and trailer communicate through the service and emergency air lines.
Inspect:
- Service and emergency gladhands
- Gladhand seals
- Air-line support
- Coiled or straight air lines
- Tractor-protection valve operation
- Trailer air-supply control
- Coupling security
- Air leaks
- Line routing
- Clearance from the deck, frame, and catwalk
- Protection against stretching during turns
Damaged or improperly connected lines can cause delayed trailer braking, loss of trailer air pressure, or unintended spring-brake application.
Inspecting Brake Chambers and Actuators
Brake Chambers and Actuators convert air pressure into mechanical movement.
Inspect each chamber for:
- Cracks
- Corrosion
- Dents
- Loose mounting hardware
- Damaged clamps
- Air leaks
- Misalignment
- Bent pushrods
- Improper chamber size
- Missing components
- Contact with the frame, suspension, or axle
- Damaged dust boots
- Incorrect installation angle
A dented spring-brake chamber may have internal damage even if it is not leaking.
The chamber, pushrod, slack adjuster, and foundation brake must remain correctly aligned. Poor alignment can cause binding, uneven wear, excessive stroke, and reduced braking force.
Understanding Pushrod Stroke
Pushrod stroke is the distance a brake-chamber pushrod travels when the brake is applied.
Excessive stroke can indicate that the brake is out of adjustment or that another foundation-brake problem exists.
Possible causes include:
- Worn brake linings
- Worn brake drums
- Incorrect automatic slack-adjuster setup
- Worn camshaft bushings
- Worn S-cam components
- Incorrect chamber size
- Improper pushrod length
- Damaged brake hardware
- Excessive component clearance
The allowable stroke depends on the chamber type, chamber size, design, markings, and applicable inspection criteria.
Stroke must be measured using the correct procedure. Guessing based on appearance is not sufficient.
Inspecting Automatic Slack Adjusters
Automatic slack adjusters are used on most modern S-cam drum-brake systems to maintain the proper lining-to-drum clearance.
Inspect them for:
- Loose or missing hardware
- Cracks
- Bent components
- Improper installation
- Binding
- Worn clevis pins
- Missing retaining devices
- Incorrect lubrication
- Misalignment
- Excessive pushrod stroke
Do not repeatedly adjust an automatic slack adjuster to conceal excessive stroke.
If an automatic slack adjuster requires frequent manual adjustment, the brake assembly should be inspected for the underlying mechanical problem.
Inspecting S-Cam Drum Brakes
A basic external inspection of an S-cam brake should include:
- Brake chamber
- Pushrod
- Clevis
- Automatic slack adjuster
- Camshaft
- Camshaft bushings
- Brake spider
- Brake shoes
- Friction linings
- Rollers
- Return springs
- Anchor pins
- Brake drum
- Dust shields
- Mounting hardware
Brake-Lining Condition
Inspect visible brake linings for:
- Insufficient thickness
- Cracks
- Missing sections
- Loose material
- Oil or grease contamination
- Heat damage
- Separation from the shoe
- Uneven wear
- Contact with rivets or shoe material
Lining thickness must be measured at the correct location and compared with the applicable limit.
Brake-Drum Condition
Inspect drums for:
- Cracks
- Scoring
- Grooves
- Heat checking
- Discoloration
- Out-of-round wear
- Hard spots
- Missing pieces
- Contamination
- Excessive diameter
- Loose mounting
A detailed inspection may require removing the drum.
A drum must not remain in service beyond the manufacturer’s wear limit or when it has disqualifying cracks or structural damage.
Camshaft and Bushing Condition
Worn camshaft bushings can allow excessive movement and cause:
- Uneven lining wear
- Poor brake adjustment
- Reduced braking force
- Excessive pushrod stroke
- Inconsistent brake release
Check for movement beyond the manufacturer’s acceptable limits and inspect seals, lubrication points, and mounting components.
Inspecting Air Disc Brakes
An Air Disc Brake System uses a caliper to clamp pads against a rotor.
Inspect:
- Brake chamber
- Caliper
- Carrier or torque plate
- Brake pads
- Rotor
- Guide pins
- Tappets
- Adjuster mechanism
- Boots and seals
- Pad retainers
- Wear indicators
- Mounting hardware
- Electrical wear sensors when equipped
Brake-Pad Condition
Inspect pads for:
- Insufficient friction material
- Uneven wear
- Cracks
- Missing material
- Contamination
- Heat damage
- Incorrect installation
- Loose retaining components
- Wear beyond the manufacturer’s limit
Uneven inner and outer pad wear can indicate restricted caliper movement, guide-pin problems, damaged boots, improper adjustment, or rotor-related issues.
Rotor Condition
Inspect rotors for:
- Cracking
- Scoring
- Grooving
- Heat checking
- Discoloration
- Corrosion
- Thickness variation
- Excessive wear
- Contamination
- Damage caused by worn pads
Rotor thickness must be measured and compared with the brake manufacturer’s minimum specification.
Not every visible surface mark requires replacement, but cracks or wear beyond allowable limits must not be ignored.
Caliper Movement
Depending on the brake design and service procedure, verify that the caliper moves correctly and is not seized.
Restricted movement can produce:
- Uneven pad wear
- Brake drag
- Overheating
- Reduced braking force
- Rotor damage
- Shortened pad life
Do not force, lubricate, or disassemble a caliper without following the manufacturer’s approved procedure.
Air Disc Brakes vs Drum Brakes During Inspection
| Inspection Area | Air Disc Brakes | Drum Brakes |
|---|---|---|
| Friction material | Brake pads | Brake shoes and linings |
| Friction surface | Rotor | Inside of brake drum |
| Application mechanism | Caliper | S-cam and camshaft |
| Adjustment system | Internal caliper adjuster | Automatic slack adjuster |
| Common wear points | Pads, rotor, guide system, caliper | Linings, drum, camshaft, bushings, rollers, springs |
| Visual access | Pads and rotor are often easier to observe | Full internal inspection may require drum removal |
| Stroke inspection | Depends on chamber and brake design | Important indicator of brake adjustment and mechanical condition |
| Common drag causes | Seized caliper or guide mechanism | Weak springs, binding camshaft, incorrect adjustment |
| Heat damage | Pads, rotor, caliper, seals | Linings, drum, springs, wheel-end components |
For a complete comparison, visit Air Disc Brakes vs Drum Brakes.
Inspecting Brake Drums and Rotors for Heat Damage
Overheated brakes may display:
- Blue or dark discoloration
- Burned friction material
- Cracking
- Glazing
- Distortion
- Unusual odor
- Smoke
- Melted nearby components
- Damaged seals
- Abnormal wheel-end temperatures
A single overheated wheel end may indicate brake drag, a seized component, improper adjustment, a bearing problem, or unequal brake operation.
Multiple overheated brakes may indicate severe operating conditions, improper downhill speed control, or broader system problems.
Do not touch a suspected overheated wheel end with bare hands.
Inspecting ABS and Electronic Braking Components
ABS and Electronic Braking Systems help control wheel slip and vehicle stability.
Inspect:
- ABS warning lamps
- Wheel-speed sensors
- Sensor wiring
- Connectors
- Tone rings
- Modulator valves
- Electronic control units
- Trailer ABS power supply
- Communication cables
- Mounting hardware
- Diagnostic fault codes
An ABS warning lamp indicates that the system has detected a fault. The foundation brakes may still operate, but the antilock function may be reduced or unavailable.
Do not assume an ABS fault is repaired merely because the warning lamp has been cleared. The underlying cause must be diagnosed and corrected.
Checking for Brake Imbalance
Brake imbalance occurs when wheel ends or vehicle units do not contribute evenly to braking.
Possible symptoms include:
- Pulling during braking
- One wheel running hotter than others
- Uneven friction-material wear
- Premature tire wear
- Trailer pushing the tractor
- Trailer brakes applying too aggressively
- One axle locking before others
- Increased stopping distance
- Vehicle instability
- Repeated ABS activation
Common causes include:
- Improper adjustment
- Air restrictions
- Contaminated friction material
- Incorrect brake chambers
- Mixed or incorrect friction materials
- Worn mechanical components
- Seized calipers
- Damaged relay valves
- Air leaks
- Incorrect repairs
- Mismatched replacement parts
A combination vehicle should be evaluated as a complete braking system rather than treating the tractor and trailer as unrelated equipment.
Common Signs of Brake Problems
Drivers and technicians should investigate:
- Low-air warnings
- Slow air-pressure build-up
- Frequent compressor cycling
- Audible air leaks
- Pulling during braking
- Weak braking response
- Excessive stopping distance
- Brake pedal pulsation
- Steering-wheel vibration
- Grinding or scraping
- Squealing
- Clunking
- Brake drag
- Smoke or burning odor
- Abnormally hot wheel ends
- Uneven pad or lining wear
- ABS warning lights
- Parking brakes that do not hold
- Parking brakes that do not release
- Excessive pushrod stroke
- Cracked drums or rotors
- Oil or grease contamination
A change in braking behavior should be inspected promptly.
Commercial Truck Brake Maintenance
Brake maintenance should follow a written preventive-maintenance program based on the vehicle’s application.
Clean and Inspect Components
Dirt, road salt, grease, oil, and debris can hide damage and accelerate wear.
Clean components only with approved methods and products. Avoid practices that spread hazardous brake dust or damage rubber components, seals, wiring, or friction material.
Lubricate Approved Points
Some drum-brake components require lubrication at specified service points.
Use only the correct lubricant and quantity. Excess grease can migrate onto the friction material.
Air disc brake components must not be lubricated unless the manufacturer identifies a specific approved location and lubricant.
Replace Worn Friction Material
Brake pads and linings should be replaced before reaching their applicable minimum thickness.
Replacement friction material should:
- Match the brake design
- Meet the vehicle’s performance requirements
- Be installed correctly
- Be compatible across the axle
- Follow manufacturer recommendations
- Avoid creating side-to-side braking differences
Replace Damaged Drums and Rotors
Drums and rotors must be measured using appropriate tools.
Replace components that are:
- Worn beyond specification
- Structurally cracked
- Severely scored
- Distorted
- Heat damaged beyond acceptable limits
- Contaminated beyond approved recovery
- Otherwise rejected by the manufacturer’s procedure
Repair Air Leaks
Air leaks should be located and repaired rather than temporarily concealed.
Replacement hoses, fittings, valves, and tubing must be properly rated and correctly routed.
Maintain the Air Dryer
The air dryer helps remove moisture, oil, and contaminants before they enter the reservoirs.
Maintenance may include:
- Replacing the desiccant cartridge
- Inspecting the purge valve
- Checking heater operation
- Checking air lines and fittings
- Monitoring reservoir contamination
- Following manufacturer service intervals
Excessive water or oil in the reservoirs can indicate compressor, air-dryer, or maintenance problems.
Drain Reservoirs as Required
Reservoir draining procedures depend on whether the vehicle uses manual drain valves, automatic drain valves, and the air-dryer configuration.
Unexpected moisture, oil, or contamination should be investigated.
Maintain ABS Components
ABS maintenance may involve:
- Repairing damaged wiring
- Cleaning and positioning wheel-speed sensors
- Inspecting tone rings
- Repairing connectors
- Replacing defective modulators
- Retrieving diagnostic codes
- Verifying warning-lamp operation
- Completing an approved post-repair test
Electronic diagnosis should support—not replace—a physical foundation-brake inspection.
Brake Maintenance Intervals
There is no single maintenance interval appropriate for every commercial vehicle.
Inspection frequency should consider:
- Vehicle mileage
- Engine hours
- Number of brake applications
- Gross vehicle weight
- Trailer weight
- Highway or urban operation
- Mountainous terrain
- Vocational service
- Dust and mud exposure
- Road salt
- Stop-and-go operation
- Driver reports
- Previous wear history
- Brake manufacturer recommendations
- Fleet maintenance experience
A refuse truck making hundreds of stops per day may require different attention than a highway tractor operating primarily on level interstate routes.
Recordkeeping and Maintenance History
Brake records help fleets identify recurring defects and predict service needs.
Useful records include:
- Inspection dates
- Inspector information
- Vehicle mileage
- Brake measurements
- Pushrod-stroke measurements
- Pad or lining thickness
- Rotor or drum measurements
- Air-leak test results
- ABS fault codes
- Parts replaced
- Repair dates
- Technician notes
- Driver-reported defects
- Roadside-inspection findings
Repeated defects at the same axle or wheel end may indicate an underlying installation, specification, operating, or maintenance problem.
Qualified Brake Inspectors
Commercial brake maintenance and inspection should be performed by people who understand the assigned task, correct procedures, tools, equipment, and applicable standards.
Federal rules establish qualifications for employees responsible for commercial-motor-vehicle brake inspection, maintenance, service, or repair. Carriers must also maintain evidence of applicable inspector qualifications. 49 CFR §396.25
Drivers can identify visible defects and perform authorized operational checks, but complex diagnosis and repair should be handled by qualified personnel.
When a Vehicle Should Not Be Operated
A vehicle should not be placed into service when a brake defect makes it unsafe or noncompliant.
Serious warning conditions include:
- Inability to maintain air pressure
- Low-air warning failure
- Major air leaks
- Cracked or missing brake components
- Inoperative brakes
- Excessive brake stroke
- Severely worn friction material
- Contaminated brakes
- Cracked drums or rotors
- Brake chambers with serious damage
- Parking brakes that will not hold
- Brakes that will not release
- Smoke or severe overheating
- Unsafe tractor-trailer brake connections
- Multiple brake defects
- Unresolved braking instability
Federal brake requirements for commercial motor vehicles are contained within 49 CFR Part 393, Subpart C. State requirements, manufacturer instructions, and current inspection criteria may also apply.
Building an Effective Brake-Maintenance Program
A strong fleet brake program includes:
- Daily driver inspections
- Clear defect-reporting procedures
- Prompt repair of reported problems
- Scheduled preventive maintenance
- Qualified brake inspectors
- Manufacturer-specific training
- Proper measurement tools
- Accurate maintenance records
- Consistent replacement parts
- ABS diagnostic capability
- Periodic inspections
- Roadside-inspection reviews
- Wear-trend analysis
- Post-repair verification
- Management accountability
The goal is to identify gradual wear and developing defects before they become safety failures or roadside violations.
Final Thoughts
Commercial truck brake inspection is a complete-system process.
Drivers should monitor air pressure, warning devices, air leaks, parking-brake operation, brake response, ABS lamps, and visible wheel-end conditions before and during operation.
Qualified inspectors must examine the air system, chambers, actuators, hoses, foundation brakes, friction materials, drums, rotors, adjustment mechanisms, ABS components, and tractor-trailer connections.
Maintenance should be based on the exact brake design, manufacturer requirements, duty cycle, vehicle weight, terrain, operating environment, and documented wear history.
Regular inspection and preventive maintenance help preserve reliable stopping performance, reduce unexpected downtime, prevent roadside violations, and identify dangerous brake defects before the vehicle returns to service.
Continue Exploring Commercial Truck Brake Systems
Explore these related Truck Equipment Atlas pages: