
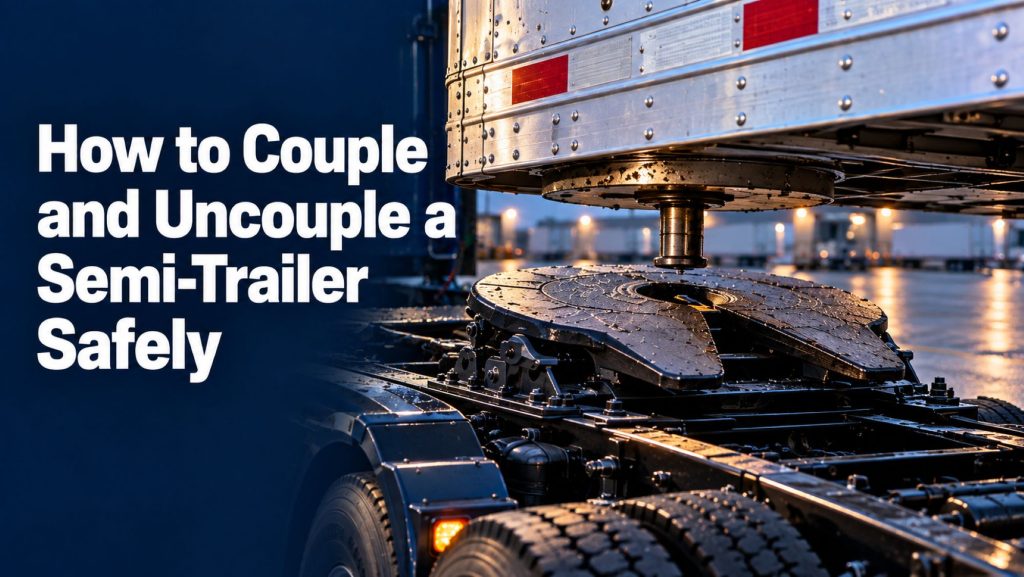
Coupling and uncoupling a semitrailer are among the most important procedures performed by a commercial truck driver. A correct coupling creates a secure mechanical, pneumatic, and electrical connection between the tractor and trailer. An incorrect coupling can damage equipment or allow the trailer to separate from the tractor.
Safe coupling requires more than backing under a trailer and hearing the fifth wheel close. The driver must align the equipment, confirm the correct trailer height, lock the kingpin inside the fifth wheel, perform a controlled pull test, and visually inspect the connection.
This guide explains the general coupling and uncoupling process for a conventional road tractor and semitrailer. Exact procedures vary by tractor, fifth wheel, trailer, suspension, landing gear, release system, carrier policy, and operating environment. Drivers must follow their training and the instructions for the equipment being used.
Why Correct Coupling Matters
The fifth wheel and kingpin form the primary structural connection between the tractor and semitrailer. The coupling must support vertical trailer load, withstand acceleration and braking forces, allow the combination to turn, and remain locked across bumps, grades, and changing road conditions.
The tractor and trailer must also exchange compressed air, electrical power, lighting signals, and electronic brake information. A complete connection therefore includes:
- Fifth wheel locked around the kingpin
- Trailer upper coupler resting correctly on the fifth wheel
- Trailer supply and service air lines connected
- Electrical cable securely connected
- Trailer landing gear fully raised for travel
- Trailer brakes, lights, and required systems operating
Know the Coupling Components
Fifth Wheel
The fifth wheel is mounted above the tractor’s drive axles. Its rear-facing V-shaped throat guides the trailer kingpin into the locking mechanism.
Kingpin and Upper Coupler
The kingpin extends downward from the trailer’s upper coupler. The fifth-wheel jaws close around its locking area while the trailer plate rests on the fifth-wheel surface.
Release Handle and Secondary Lock
The release handle opens the fifth-wheel locking mechanism for uncoupling. Many models also use a secondary lock or latch.
Gladhands and Air Lines
The supply line charges the trailer air system and helps release the trailer spring brakes. The service line carries the tractor’s brake-control signal to the trailer.
Electrical Cable
The electrical connection supplies power for trailer lighting, ABS, and other equipped systems.
Landing Gear
Landing gear supports the front of the trailer when it is not connected to a tractor. Both legs, feet, braces, crank components, and the supporting ground surface must be suitable for the load.
Before Approaching the Trailer
Begin with a walk-around inspection of the area, tractor, and trailer.
- Confirm that the correct trailer has been identified.
- Check for people, vehicles, equipment, dock hazards, overhead obstructions, and uneven ground.
- Confirm that the trailer is stable and its parking brakes are applied or it is otherwise secured according to procedure.
- Inspect the landing gear and supporting surface.
- Look for trailer lean, sinking legs, frame damage, or shifted cargo.
- Inspect the kingpin and upper coupler for obvious damage, contamination, or distortion.
- Inspect the fifth wheel, mounting system, locking mechanism, release handle, and lubrication condition.
- Confirm that the fifth-wheel throat faces the rear and the locks are ready to receive the kingpin.
- Check that air and electrical lines are supported and clear of the backing path.
Do not attempt to couple a trailer that appears unstable, damaged, incorrectly supported, or unsafe to approach.
How to Couple a Semi-Trailer Safely
The following sequence is a general educational overview. Use the exact approved procedure for the tractor, trailer, fifth wheel, and carrier.
Step 1: Align the Tractor and Trailer
Position the tractor directly in front of the trailer. The center of the fifth-wheel throat should align with the kingpin. Straight alignment reduces side loading and helps prevent the kingpin from striking the fifth wheel incorrectly.
Use mirrors and get out to look when necessary. Do not rely on guesswork when visibility is limited.
Step 2: Back Slowly Toward the Trailer
Back until the tractor is close enough to evaluate alignment and trailer height safely. Stop, secure the tractor, and inspect before moving beneath the trailer.
Step 3: Check Trailer Height
The trailer must be at the correct height for the fifth wheel to contact the upper coupler and lift the trailer slightly as the tractor backs underneath. Follow the manufacturer’s height guidance.
If the trailer is too high, the kingpin may pass above the locking jaws. This is called high coupling. If the trailer is too low, the tractor or fifth wheel may strike the trailer and damage the frame, upper coupler, landing gear, suspension, or driveline.
Step 4: Confirm the Fifth Wheel Is Ready
Confirm that the top plate is positioned correctly, the throat is aligned with the kingpin, and the locking mechanism is in the coupling-ready position. The rear of the fifth wheel should be tilted as specified for the model.
Step 5: Back Under the Trailer
Back slowly and in a straight line. The trailer upper coupler should contact the fifth-wheel approach surface. As the tractor continues beneath the trailer, the fifth wheel should support and slightly lift the trailer while the kingpin moves into the throat.
Continue at low speed until the kingpin activates the locking mechanism and resistance is felt. Do not strike the trailer aggressively.
Step 6: Perform a Controlled Pull Test
With the trailer secured according to the approved procedure, ease the tractor forward gently to test whether the fifth wheel holds the kingpin. The pull test provides useful confirmation, but it is not proof by itself that the coupling is correct.
Step 7: Secure the Combination
Set the required parking brakes, place the transmission in the appropriate position, shut down or secure the vehicle as required, and prevent movement before leaving the cab.
Step 8: Visually Inspect the Fifth-Wheel Lock
Get out and look beneath the trailer using adequate lighting. Do not rely only on the sound of the lock, the release-handle position, an in-cab indicator, or the pull test.
- Confirm that the kingpin is inside the locking mechanism rather than above or behind it.
- Confirm that the jaw, wedge, locking bar, or other model-specific components are fully closed.
- Confirm that the release handle and secondary lock are in the locked position specified by the manufacturer.
- Confirm that there is no improper gap between the fifth-wheel plate and trailer upper coupler.
- Look for damage, interference, or an unusual trailer angle.
If any part of the connection is uncertain, stop. Open the fifth wheel as directed, inspect the equipment, correct the condition, and repeat the coupling process.
Step 9: Connect the Air and Electrical Lines
Connect the trailer supply and service gladhands to their correct connections. Inspect the seals and couplers, then secure the electrical cable. Route every line so it has enough movement for turns but cannot drag, kink, rub, become pinched, or contact hot and moving components.
Some approved procedures connect or charge the trailer at a different point in the coupling sequence. Follow the procedure specified for the vehicle and operation.
Step 10: Charge and Check the Trailer Systems
Supply air to the trailer according to the approved procedure. Listen for significant leakage and confirm that the trailer air system, brakes, ABS indicators, and electrical circuits respond correctly.
Step 11: Raise the Landing Gear
Raise the landing gear fully using the correct gear range and crank procedure. Secure the crank handle in its keeper and confirm adequate clearance beneath the legs. Do not leave the landing gear partially raised for road travel.
Step 12: Complete the Combination-Vehicle Inspection
Before moving onto the road, inspect the complete combination. Check lights, reflective equipment, tires, brakes, air lines, electrical cable, doors, cargo securement, landing gear, fifth-wheel mounting, clearances, and other required items. Confirm trailer-brake operation before normal travel.
The Three-Part Coupling Verification
A reliable verification process uses three different checks:
- Mechanical response: the fifth wheel closes as the kingpin enters.
- Controlled pull test: the tractor encounters resistance from the secured trailer.
- Direct visual inspection: the driver sees the kingpin inside the closed lock, correct handle position, and proper plate contact.
No single sound, light, sensor, or cab indication replaces the complete verification required for the equipment.
How to Uncouple a Semi-Trailer Safely
Uncoupling requires control of the trailer before the tractor connection is released. The ground must support the landing gear and trailer load.
Step 1: Choose a Safe Location
Park on firm, level ground whenever possible. Avoid soft shoulders, steep grades, drainage areas, unstable pavement, or locations where the trailer creates a traffic or dock hazard.
Step 2: Align and Secure the Combination
Straighten the tractor and trailer when practical. Apply the required trailer and tractor parking brakes and secure the vehicle against movement. Use wheel chocks when required by the procedure or conditions.
Step 3: Relieve Pressure on the Lock
Back the tractor gently against the trailer as directed to reduce tension on the fifth-wheel locking mechanism. Excessive forward pressure can make the release handle difficult to operate.
Step 4: Lower the Landing Gear
Lower the landing gear until both feet make secure contact with the ground or approved support. Use pads where required. Follow the trailer and landing-gear instructions for supporting the load and selecting high or low gear.
Do not raise the trailer excessively with the landing gear. The goal is to support the trailer and prepare for separation without creating damaging loads or an unstable condition.
Step 5: Disconnect and Secure the Lines
Disconnect the electrical cable and gladhands according to the approved sequence. Secure the tractor lines in their holders and protect the trailer connections from dirt, water, and damage. Never allow cables or hoses to fall where the tractor can run over them.
Step 6: Release the Fifth Wheel
Disengage the secondary lock and operate the manual or air release according to the fifth-wheel instructions. Keep clear of pinch points and never place any part of the body between equipment that could move.
Step 7: Pull Partly Clear and Recheck the Trailer
Release the tractor brakes and move forward slowly until the kingpin clears the locking jaws but the tractor frame or fifth wheel remains near the trailer front. Stop, secure the tractor, and confirm that the trailer is stable on its landing gear.
Step 8: Pull Completely Clear
Once stability is confirmed, pull forward slowly until the tractor clears the trailer. Watch the landing gear, trailer height, lines, surrounding vehicles, and overhead space.
Air-suspension inflation or deflation procedures vary by tractor and fifth-wheel manufacturer. Follow the exact procedure for the equipment rather than assuming when the suspension should be dumped or reinflated.
Common Coupling Mistakes
High Coupling
The trailer is too high, allowing the kingpin to pass above the jaws. The trailer may appear connected even though the kingpin is not captured.
Backing Off Center
Misalignment can cause the kingpin to strike the throat, damage coupling components, or push the trailer sideways.
Relying Only on the Sound
A closing sound does not prove that the kingpin is locked correctly. Mechanical and visual verification are still required.
Skipping the Visual Inspection
An incorrect coupling may resist a light pull test. The driver must inspect beneath the trailer and confirm the actual position of the kingpin and locking components.
Forgetting the Lines or Landing Gear
Moving with disconnected, crossed, dragging, or pinched lines can disable trailer systems. Moving with landing gear down can cause equipment damage or loss of control.
Dropping on Weak Ground
Trailer landing gear can sink into soil, asphalt, or damaged pavement. Ground conditions and support capacity must be evaluated before uncoupling.
Stop the Procedure If You Find
- A trailer that is leaning, sinking, or unstable
- A bent, cracked, loose, or excessively worn kingpin
- A damaged or distorted upper coupler
- Cracks or loose mounting components at the fifth wheel
- A lock that does not open, close, or remain secured correctly
- A release handle or secondary lock that does not reach the specified position
- An improper gap between the trailer plate and fifth wheel
- Air lines, gladhands, seals, or electrical connectors that cannot be secured
- Landing gear that cannot support or raise the trailer safely
- Insufficient cab, frame, tire, or landing-gear clearance
- Any uncertainty about whether the kingpin is inside the lock
Coupling in Snow, Ice, and Cold Weather
Ice, compacted snow, frozen grease, road salt, and low temperatures can interfere with the fifth-wheel lock, release linkage, gladhands, slider components, landing gear, and visual inspection.
- Remove ice and contamination from the fifth wheel and upper coupler.
- Confirm that the lock moves through its complete range.
- Use lighting to inspect beneath the trailer.
- Check gladhand seals and air connections for freezing or damage.
- Do not force frozen release or landing-gear components.
- Follow the manufacturer’s cold-weather maintenance instructions.
Frequently Asked Questions
Is a tug test enough to confirm coupling?
No. A controlled pull test is important, but it must be followed by a direct visual inspection of the kingpin, locking mechanism, release system, and contact between the trailer plate and fifth wheel.
Should the trailer touch the fifth wheel before the kingpin locks?
In a conventional coupling, the trailer upper coupler should contact the fifth wheel and the tractor should slightly lift the trailer as it backs underneath. Follow the equipment manufacturer’s height requirements.
What is high coupling?
High coupling occurs when the trailer is too high and the kingpin passes above the fifth-wheel lock instead of entering it.
When should the landing gear be raised?
Raise the landing gear after the mechanical coupling has been secured and verified and at the point specified by the approved coupling procedure. It must be fully raised and the crank secured before road travel.
Can an in-cab fifth-wheel sensor replace visual inspection?
No. Sensors can provide useful information, but drivers must complete the required direct inspection and verification procedure.
Final Thoughts
Safe coupling depends on alignment, correct trailer height, controlled backing, secure fifth-wheel locking, a pull test, and direct visual confirmation. Safe uncoupling depends on stable ground, secure brakes, proper landing-gear support, controlled release, and confirmation that the trailer is stable before the tractor pulls completely clear.
Never rush the procedure or rely on a single sound, indicator, or test. When anything looks damaged, unstable, misaligned, or uncertain, stop and correct the condition before moving the vehicle.
Continue Exploring Fifth Wheel and Coupling Equipment
- Fifth Wheel & Coupling Equipment Guides
- How Commercial Truck Fifth Wheels Work
- Fixed vs Sliding Fifth Wheels
- How to Inspect and Maintain a Fifth Wheel and Kingpin
- How to Choose a Commercial Truck Fifth Wheel
- Fifth Wheels & Coupling Equipment
Important note: This guide provides general educational information and is not a substitute for hands-on driver training. Coupling, uncoupling, inspection, maintenance, and repair must follow applicable regulations, carrier procedures, and the instructions published by the tractor, trailer, fifth-wheel, landing-gear, and component manufacturers.