
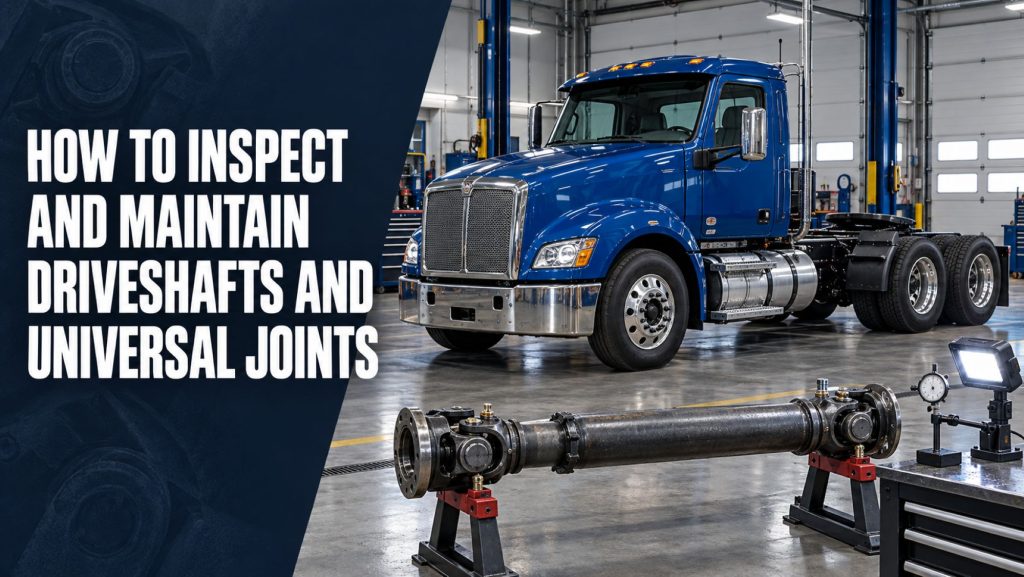
Commercial truck driveshafts and universal joints transfer engine torque from the transmission to the drive axle while accommodating changes in angle and length caused by suspension movement, axle travel, and frame flex. Because these components rotate at high speed and carry substantial torque, looseness, poor lubrication, incorrect phasing, damaged tubing, or improper operating angles can quickly become serious problems.
Regular inspection helps identify wear before it leads to vibration, damaged yokes, failed carrier bearings, driveline separation, or secondary damage to the transmission and axles. This guide explains how to inspect and maintain driveshafts, universal joints, slip joints, carrier bearings, yokes, flanges, and related mounting components.
How a Commercial Truck Driveshaft Works
The driveshaft is the rotating connection between the transmission output and the drive axle input. Power moves through the commercial truck transmission, through the driveshaft, and into the axle differential. The differential then distributes torque to the axle shafts and drive wheels.
Universal joints allow power to pass between components that are positioned at an angle. A slip joint or sliding spline allows the driveshaft’s effective length to change as the axle moves. Longer vehicles may use a multi-piece driveshaft with a carrier bearing supporting the connection between shaft sections. The differences between these layouts are explained in Single-Piece vs Multi-Piece Truck Driveshafts.
Major Components to Inspect
Driveshaft Tube
The tube forms the main rotating body of the driveshaft. It must remain straight, balanced, and free from dents, cracks, severe corrosion, rubbing damage, and unauthorized weld repairs. Even a small dent or missing balance weight can affect shaft balance at highway speed.
Universal Joints
A universal joint typically includes a cross, four bearing caps, needle bearings, seals, and retaining hardware. The joint should articulate smoothly without looseness, binding, missing retainers, damaged seals, grease leakage, or rust-colored powder around the bearing caps.
Yokes and Flanges
Yokes connect the universal joints to the shaft, transmission, axle, or adjacent driveshaft section. Companion flanges, end yokes, slip yokes, and weld yokes must remain free from cracks, distortion, excessive wear, loose fasteners, damaged splines, and elongated retaining surfaces.
Slip Joints and Splines
The slip assembly allows the driveshaft to change length as the suspension moves. Splines require correct engagement and must not have excessive rotational or radial movement. Seals, dust caps, and lubrication passages help protect the sliding surfaces from water, dirt, and abrasive material.
Carrier Bearings
A carrier bearing supports the intermediate shaft in a multi-piece driveline. The bearing, rubber cushion, bracket, crossmember, and mounting hardware must hold the shaft at the designed height and position. A torn or collapsed rubber support can change driveline angles even before the bearing itself fails.
Guards, Loops, and Retaining Hardware
Where fitted, driveshaft guards or safety loops should be inspected for damage, looseness, incorrect clearance, and missing fasteners. Universal-joint straps, bolts, lock plates, snap rings, and other retainers must be present and installed according to the component manufacturer’s procedure.
Warning Signs of Driveshaft or Universal-Joint Problems
| Warning Sign | Possible Causes |
|---|---|
| Clunk during acceleration or deceleration | Worn universal joint, loose flange, worn splines, excessive differential backlash, or loose mounting hardware |
| Speed-related vibration | Shaft imbalance, missing balance weight, tube damage, runout, incorrect angles, worn joints, or critical-speed problem |
| Squeaking at low speed | Dry or failing universal-joint bearing caps |
| Rumbling or grinding | Carrier-bearing damage, worn universal joint, damaged slip joint, or related axle or wheel-end problem |
| Shudder during takeoff | Incorrect operating angles, suspension wrap, worn mounts, damaged joint, or clutch-related condition |
| Grease around a joint | Damaged seal, excessive lubrication pressure, loose cap, or joint wear |
| Rust-colored powder | Loss of lubrication, water intrusion, failed seal, or internal bearing-cap movement |
| Repeated carrier-bearing failure | Incorrect bearing position, driveline misalignment, shaft imbalance, damaged bracket, or incorrect ride height |
Safety Before Inspection
A truck must be secured against movement before anyone works near or underneath the driveline. Follow the vehicle, shop, and component manufacturers’ safety procedures, including proper parking, wheel chocking, support equipment, energy isolation, and personal protective equipment.
- Never crawl beneath an inadequately supported vehicle
- Never touch or approach an exposed rotating driveshaft
- Keep clothing, hair, tools, cords, and equipment away from rotating components
- Do not rely on the parking brake alone to prevent vehicle movement
- Use appropriate lifting and support equipment when axle position must be changed
- Mark shaft sections before removal when their original position must be preserved
Step-by-Step Driveshaft Inspection
- Review the complaint. Record when the noise or vibration occurs, including road speed, engine load, gear, acceleration, deceleration, and whether the truck is loaded.
- Inspect the complete driveline path. Check from the transmission output to the drive axle, including every shaft section, joint, bearing, bracket, flange, and fastener.
- Examine each shaft tube. Look for dents, cracks, corrosion, abrasion, heat discoloration, missing balance weights, damaged welds, and evidence of contact with the frame or equipment.
- Check universal-joint movement. Look for looseness between the cross and bearing caps, cap movement in the yokes, binding, damaged seals, missing retainers, or dry bearings.
- Inspect yokes and flanges. Check for cracks, spreading, wear, damaged bolt holes, fretting, loose hardware, and damaged splines.
- Inspect slip joints. Check spline engagement, seal condition, contamination, lubrication, and excessive rotational, radial, or axial movement.
- Inspect carrier bearings. Check the bearing, rubber support, bracket, crossmember, fasteners, mounting height, and clearance around the shaft.
- Verify phasing. Confirm that yokes and shaft sections are indexed in the correct relationship, especially after previous service.
- Evaluate operating angles. Measure angles using the approved procedure when vibration, suspension changes, or repeated failures are present.
- Inspect related components. Check engine and transmission mounts, axle seats, torque rods, springs, air suspension ride height, and differential mounting.
Axle and differential looseness can produce symptoms similar to driveshaft problems. The Axle and Differential Guides provide additional information about drive axles, differentials, gearing, and common operating concerns.
How to Check Universal Joints
Universal joints should be checked for both free movement and unwanted movement. A joint may fail by becoming loose, but it can also seize or bind when lubrication is lost or needle bearings are damaged.
- Look for movement between a bearing cap and its yoke
- Check for play between the cross and bearing caps
- Inspect seals for tears, displacement, or lubricant loss
- Check retaining rings, straps, bolts, and lock plates
- Look for polished surfaces or fretting around cap bores
- Check for rust-colored dust, which can indicate internal wear or cap movement
- Confirm that the joint articulates smoothly without roughness or binding
Universal-joint looseness should not be judged only by visible movement. Component manufacturers may specify measurement methods and service limits. Replace damaged yokes or related hardware when required rather than installing a new joint into a worn retaining surface.
Universal-Joint Lubrication
Some commercial universal joints are serviceable and contain grease fittings, while others are permanently lubricated. Serviceable joints require the correct lubricant at the specified interval. Operating environment, water exposure, dust, heavy loads, frequent low-speed maneuvering, and severe vocational use may affect the maintenance schedule.
- Clean the grease fitting before connecting the lubrication equipment
- Use the lubricant specified for the joint and vehicle application
- Follow the manufacturer’s instructions for purging old lubricant and contaminants
- Confirm that lubricant reaches all required bearing caps when the design permits verification
- Do not force lubricant into a blocked joint until the cause is understood
- Replace damaged grease fittings and protective caps as required
A joint that will not accept or distribute lubricant may contain a blocked passage, damaged fitting, misaligned internal channel, seized bearing, or hardened lubricant. Simply increasing grease-gun pressure can damage seals without correcting the underlying problem.
Slip-Joint and Spline Maintenance
Slip joints must move enough to accommodate axle travel without binding, bottoming, or separating. Serviceable splines require the approved lubricant and application method. Too little lubricant can cause wear and binding, while incorrect quantities or products can damage seals or create hydraulic lock in some assemblies.
Check for twisted splines, corrosion, fretting, contamination, damaged seals, and excessive backlash. A worn slip joint may create a clunk during load changes even when the universal joints remain tight.
Carrier-Bearing Inspection and Maintenance
On a multi-piece driveshaft, inspect the carrier bearing as part of the complete driveline rather than as an isolated component. Check bearing rotation, internal looseness, rubber condition, bracket alignment, mounting fasteners, crossmember condition, and shaft clearance.
The carrier bearing’s position affects universal-joint operating angles. Installing a replacement at the wrong height or forcing the rubber support into an incorrect position can create vibration. Repeated carrier-bearing failure should trigger an inspection of shaft balance, phasing, alignment, ride height, brackets, and related suspension components.
Driveshaft Phasing and Balance
Phasing describes the rotational relationship between the yokes on a shaft. Separating a splined assembly and reinstalling it in the wrong indexed position can cause vibration. Before removing a shaft, use the approved identification method to preserve its installed orientation and the relationship among multiple sections.
Driveshafts are balanced assemblies. Do not remove welded balance weights, strike the tube, attach objects to it, or make unapproved weld repairs. Dirt, concrete, ice, or other material stuck to the shaft can also create imbalance and should be removed without damaging the tube or coating.
Operating Angles and Ride Height
Universal-joint angles must remain within the limits established for the vehicle and driveline. Excessive, unequal, incorrectly coordinated, or extremely small working angles can cause vibration and accelerated wear. Multi-piece systems require evaluation of every shaft section and the carrier-bearing position.
Ride height changes axle position and therefore changes driveshaft angles and slip-joint travel. Air-suspension or mechanical-suspension problems should be corrected before final driveline-angle measurements are made. Explore the Suspension System Guides for related information about ride height, axle control, and suspension wear.
When a Driveshaft Must Be Removed
A driveshaft may need professional removal and evaluation when inspection reveals:
- A bent, dented, cracked, or deeply corroded tube
- A missing balance weight or evidence of prior unauthorized repair
- Universal-joint looseness, binding, seal failure, or damaged retainers
- Cracked, spread, worn, or distorted yokes
- Excessive spline or slip-joint wear
- A failed carrier bearing or collapsed support rubber
- Loose, damaged, or fretted companion flanges
- Persistent vibration after related tires, wheels, suspension, and axle conditions are checked
Removed shaft sections can be heavy and awkward. They must be supported before retaining hardware is released. Dropping or allowing a shaft to hang from a remaining universal joint can damage the shaft, joint, yoke, seal, transmission, or axle input.
Common Maintenance Mistakes
- Ignoring a small vibration until it damages additional components
- Replacing a universal joint without checking worn yokes or retainers
- Reassembling a splined shaft out of phase
- Installing a carrier bearing at the wrong height or position
- Using incorrect fasteners, straps, retainers, or tightening procedures
- Lubricating only the easiest-to-reach fitting
- Assuming every joint uses the same grease or interval
- Welding, heating, straightening, or modifying a shaft without qualified procedures
- Failing to correct suspension ride height or damaged powertrain mounts
Frequently Asked Questions
How often should commercial truck universal joints be lubricated?
The interval depends on the joint, vehicle, lubricant, and operating conditions. Follow the current vehicle and component manufacturers’ maintenance schedules. Severe-duty, wet, dusty, or high-load operation may require more frequent attention.
Can a universal joint be bad without being loose?
Yes. A joint can bind or seize because of failed needle bearings, corrosion, contamination, or loss of lubrication. Binding may cause vibration and poor articulation without obvious looseness.
What does rust-colored dust around a universal joint mean?
Rust-colored powder can indicate water intrusion, dried lubricant, internal bearing wear, or movement between a bearing cap and yoke. The joint and retaining surfaces require closer inspection.
Can tire problems feel like driveshaft vibration?
Yes. Tire imbalance, irregular wear, wheel damage, loose wheel bearings, and axle or suspension problems can resemble driveline vibration. The commercial truck tire inspection guide covers related tire warning signs.
Should a driveshaft be marked before removal?
Yes, when required by the service procedure. Marking the installed orientation and relationship among shaft sections helps preserve phasing and balance orientation during reassembly.
Protecting the Complete Driveline
Driveshaft maintenance is not limited to greasing universal joints. Reliable operation depends on the condition and alignment of the transmission, shaft sections, universal joints, slip assemblies, carrier bearings, yokes, flanges, drive axles, suspension, and mounting hardware.
Early investigation of vibration, clunking, squeaking, looseness, damaged seals, and lubricant loss can prevent a minor wear condition from becoming a major driveline failure. Understanding how the shaft connects the transmission to the axle also makes it easier to separate a true driveshaft problem from symptoms caused by gearing, differentials, suspension, tires, or wheel ends.
Continue Exploring Commercial Truck Drivetrain Systems
- Single-Piece vs Multi-Piece Truck Driveshafts
- How Commercial Truck Transmissions Work
- Commercial Truck Transmission Guides
- How Commercial Truck Axles and Differentials Work
- Axle and Differential Guides
- Commercial Truck Axle Ratios Explained
- How Commercial Truck Suspension Systems Work
- How to Inspect and Maintain Commercial Truck Tires